


cracks in hypertufa pots
dizadncr
13 years ago
Featured Answer
Sort by:Oldest
Comments (11)

valolson1
13 years agobillie_ann
13 years agoRelated Discussions
Hypertufa cracks
Comments (16)Hi ruegge. Here is my opinion and cosequently here is where I evoke the wrath of the tufa gods and blaspheme against the holy peat. My thoughts on hypertufa are well known and documented on this garden web forum. Dare I suggest you try (try, says I) to construct your project without peat moss of course I do. If your projects negative space can be filled with more than one gallon of water try something else. For weed pots, herb planter or sedum pots hypertufa seems to work really well, beyond that I have my doubts and suspicions. I believe people who post about having cracked pots are truthful; I mean who would post a message admitting to a failing if there was none. On the other hand people who say, "IÂve never had a hypertufa pot crack" well whatever. For those that do they blame everything under the sun  except the holy peat. I have been in some heated exchanges about tufa and the holy peat. My conclusion is: a bunch of folk who make hypertufa continue to promote their mantra; if it doesnÂt have peat moss, well, then, it just ainÂt hypertufa. (See Wikipedia definition at the end of this harangue.) Accordingly it is a sacred ternate that, no matter what the ingredient list at the very least the mix must contain peat moss to be hypertufa. Naturally I disagree but rather than continue a close-minded discussion I simply DONÂT make "hypertufa" I make concrete (look that up for laughs). My pieces are made using just about everything; vermiculite, perlite, sand (both fine and course), latex paint instead of water, metal filings, polystyrene beads (bean-bag beads), anything, BUT I DON"T USE PEAT MOSS! I still have failures but not near as many as I did with the holy peat. Mostly I just get too impatient and move ahead before I should. Oh, keep in mind if you want to "work" or "tool" the finish, sand will wear away files and metal tools. IMO use whatever you want to make your project a success and then call it hypertufa, hyperthreefer, or stretch it to be rueggetufa. Most importantly have fun and experiment. Hypertufa From Wikipedia, the free encyclopedia HYPERTUFA IS AN ANTHROPIC ROCK MADE FROM VARIOUS AGGREGATES BONDED TOGETHER USING PORTLAND CEMENT. Hypertufa is intended as a manufactured substitute for natural tufa, which is a slowly precipitated limestone rock; being very porous, it is favorable for plant growth. Hypertufa is popular for making garden ornaments, pots and land forms. Hypertufa is relatively light compared with terra cotta or concrete and can withstand harsh winters, at least down to -30 °C (-20 °F). Basic recipe Using the classic proportions for mortar (1 part cement: 3 parts aggregate) hypertufa is composed of 3 parts Portland cement - Type I 4 parts peat 5 parts perlite (3 parts cement: 9 parts aggregate)  1:3 ratio Other recipes may call for sand or gravel as aggregates, but they add unwanted weight without necessarily adding strength. To increase structural strength and longevity, synthetic reinforcing fibers (plastics, not fiberglass) and liquid acrylic may be incorporated into the mixture. Powdered mineral colors (in small amounts) tint the hypertufa to resemble natural rock. Speaking of rocks - this rock (52"l X 32"w X 20"h and hollow) has been through two seasons without a crack. Ducking sniper fire and running for cover! Robert p.s. I'm really a nice guy....See MoreHypertufa over old clay pots?
Comments (2)Don't know if you can do this with the trees in the pots. Normally you would turn the pots up side down, wet the pots so you have a damp surface and add an acrylic fortifier to your mix. After the bottom and sides have setup you turn the pot over and finish the return on the inside of the pot. You only have to cover down to where the soil would start inside the pot. Since your pot is starting to deteriorate I don't now if it can stand up to the removing of the trees or any of the other process....See MorePlastic Pot Recycling - Hypertufa-Covered Pot #3
Comments (0)Image by: fuzzy Hypertufa covered plastic pot Plastic Pot Recycling - Hypertufa-Covered Pot Member fuzzy also revamped a large (gallon size) black plastic pot: Cover the outside of the pot with chickenwire, crimp it around the rim about 2" down and around the bottom about the same amount. Next, I turn it upside down and pack hypertufa (leaving the center drainage hole) all over the bottom and sides. A day later, flip it over and cover the rim and the 2" on the inside. A day after that, use some chickenwire scraps to rough up the outside. Now that the inside is invisible (because it's filled with dirt), you'd never know it's a black nursery pot... For more information and hypertufa "recipes" be sure to check out the Garden Web Hypertufa forum...See MoreCement Pots Cracking
Comments (50)I would use a standard hypertufa mix or use premixed concrete (don’t try to make your own unless you are familiar with the chemistry and points of making a good strong mix). Do not get quick Crete like they use for post holes. That works well because it’s in the ground and rain and water keep it damp as it cures. Remember first, concrete never stops curing. It sets up etc and can be used like driveways after at least a week two weeks better. But even then you keep it covered and misted each day — the longer it stays damp (damp not wet in the beginning) the stronger it will be. But the faster you try to dry and cure it, the more cracks, and more brittle it will be. I see people out there doing DIY walks etc and they got fans going cause they want to use that day or the next — and they wonder why it’s cracked, chipping up on the edges, and spalling in a few months. The way I use to do hypertufa (for lightness of weight) or regular concrete if I needed it to stay in place ie wildlife not messing with them - was to make them up, unmold, and then immediately mist, wrap in double layers of heavy plastic and leave sitting in the shade (no sun) for a few days, check it each day and mist it down daily and cover it back up. Do this for 4-5 days. Uncover and let sit in the shade for 6-8 months and mist it down daily .when it rains obviously no need like in the winter. By following spring or summer - put in big tub etc of water and let soak. Change the water every day x 3 or more if you can. Check water with a pH meter. When it reaches around 6-7 you can plant anything you want except for blueberries they want pH around 4-5 I believe. You are trying to neutralize the lime or the pH out of the pot. Concrete is around12-13 (highly alkaline). Even hypertufa is high because it’s peat and concrete but not quite as bad as straight concrete. Peat Moss is about 3-4 pH (very acidic) and it will bring down the concrete some. And this is how we do hypertufa too. But if the pH is still around 8 then you will need to make sure what you put in it can stand that high a pH - not a lot of choices. Remember 7 is neutral, under is acidic, over is alkaline. Roses like 6-6.5, tomatoes 5.5-6, beans like snaps like 6.5-7+ a little. Asparagus like 7 maybe +. Lilacs like higher 6.5-7.5, Cactus can take higher 7+, but there are lots of pH plant charts. Your potting mixes will be acidic based (peat Moss, and bark) but they initially charge all potting mixes with lime to bring them to a general pH. You can contact whoever’s brand you use (look the manufacturer on the internet, they all have customer service)call them up and ask. They will all be different and different mixes within the same manufacturer line may be different if made for different types of plants. A general mix would be 6-6.5 or 5.5-6.5. You can do a media pour-through test - search “media pour thru pH testing) so you know for sure. But the initial lime charge only lasts about 4-6 months depending on how often you water or it rains. You need to resweeten the soil each year — it depends on the size of the pot. Or you can retest with pour through technique to know what the level is. Regular Lime adds calcium, dolomite lime adds magnesium and calcium. If the pH is okay and you want to add calcium - use gypsum. I just know that mine will need it so I add a tablespoons every 6 months for pots 6-10” and up it for larger. If the pot is deep, you will need more or less. For things like tomatoes I add gypsum because they like calcium and you won’t get cat faced or blossom end rot. But back to the pots. I wouldn’t plant in them for at least 6-8 months or at least through your rainy season, and 3-5 days soaking and changing the water daily. If you don’t change the water, you aren’t getting rid of the lime. Check the pH and dilute with water til it reaches 7-7.3 and sprinkle your lawn with the soaking water — it will like the higher pH....See Moredizadncr
13 years agobillie_ann
13 years ago
Mike Larkin
13 years agodizadncr
13 years agoBelgianpup
13 years agolinwir
13 years agoMike Larkin
13 years agoRegina Patterson
2 years ago
Related Stories
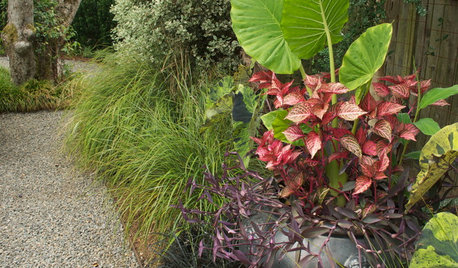
CONTAINER GARDENSSolve Your Garden Border Dilemmas With Planted Pots
Set your containers free from the patio — placed among plantings in the ground, they fill unsightly gaps, let you experiment and more
Full Story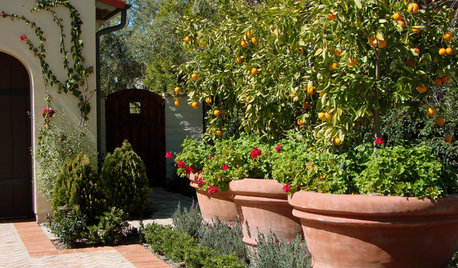
GARDENING GUIDESPick the Right Plant Pot to Flatter Your Landscape
To play matchmaker for your container garden and its surroundings, you've got to know all the materials and pick the right style
Full Story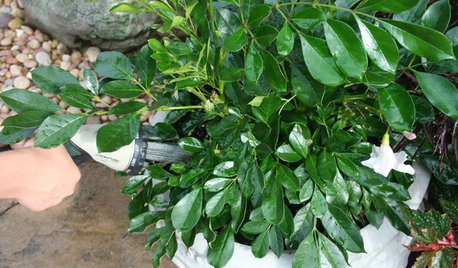
CONTAINER GARDENSContainer Garden Basics: How and When to Water Potted Plants
Confused about soil moisture, the best time to water and what watering device to use? This guide can help
Full Story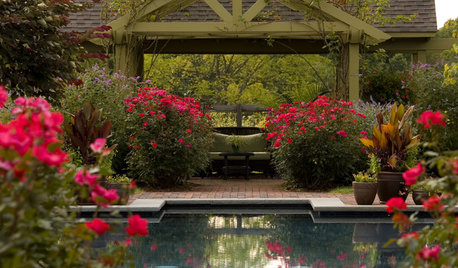
SPRING GARDENINGHow to Grow a Rose Garden in Pots
Everything can come up roses, even without a plot of soil in sight. This step-by-step guide to growing roses in containers shows you how
Full Story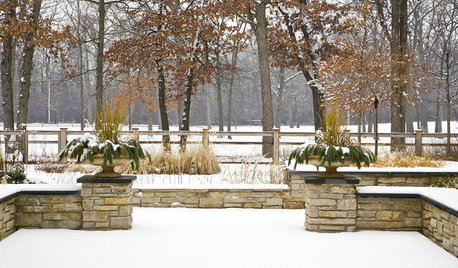
CONTAINER GARDENS5 Important Winter Tasks to Keep Container Gardens in Shape
Prevent cracked pots, blight spread and withered plants come spring by focusing on this essential maintenance now
Full Story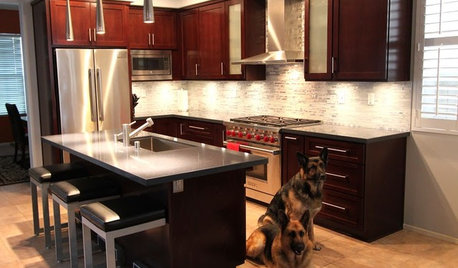
BEFORE AND AFTERSReader Project: California Kitchen Joins the Dark Side
Dark cabinets and countertops replace peeling and cracking all-white versions in this sleek update
Full Story
HOUSEKEEPINGOutdoor Home Prep to Do Before Hard Winter Hits
Avoid cracking, rusting and rotting during freezes by taking care of these tasks now
Full Story
REMODELING GUIDES9 Hard Questions to Ask When Shopping for Stone
Learn all about stone sizes, cracks, color issues and more so problems don't chip away at your design happiness later
Full Story
KITCHEN DESIGNGuest Picks: Silliness in the Kitchen
20 ways to crack a smile while cooking up something seriously delicious
Full Story
CONTAINER GARDENS10 Ways to Take Containers Beyond the Patio
Enliven your landscape with pots and containers
Full Story
daisy_ny6